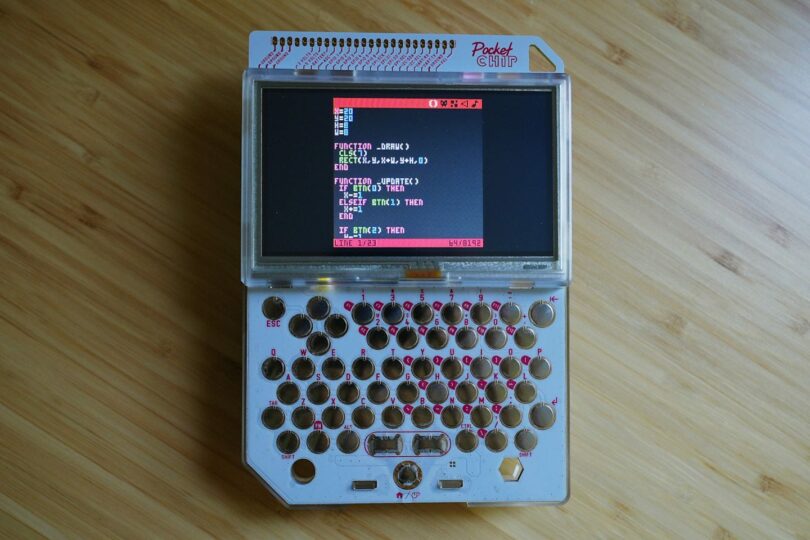
PICO-8 is a fantasy console designed by Joseph White of Lexaloffle Games. The hardware specifications have been codified in what I would consider an emulator of sorts. Once downloaded, it can be used to play games as well as develop them, design graphics, and compose sound effects and music. You could even run PICO-8 on a Raspberry Pi, or I personally use a Pocket CHIP handheld computer from the now-defunct Next Thing Co. There have been some pretty incredible PICO-8 games developed despite its very limiting specs. The team behind Celeste even built a PICO-8 version of the game as a prototype before making the final game.
PICO-8 games are developed in Lua, which is a pretty simple language. As long as you understand how functions, variables, conditionals, and loops work, you can get started. Save the more challenging stuff for later. I wanted to walk through a super simple example game that helped me learn some of the basics. We’ll draw our character, a box for now, and move it around the screen. If you have any interest in game development, it could be a good starting point for you too.
Initialize Your Variables
We’ll start by defining a few variables for ourselves. In PICO-8, the coordinate system starts in the top left. Higher x values are to the right of the screen, and higher y values are toward the bottom of the screen. We will first set our starting x and y coordinates to be 20 pixels from the top of the screen and 20 pixels from the left. We’ll then set the h and w or height and width of our box to 8 pixels each to make a square, but you can do what you’d like.
x=20
y=20
h=8
w=8
Drawing On The Screen
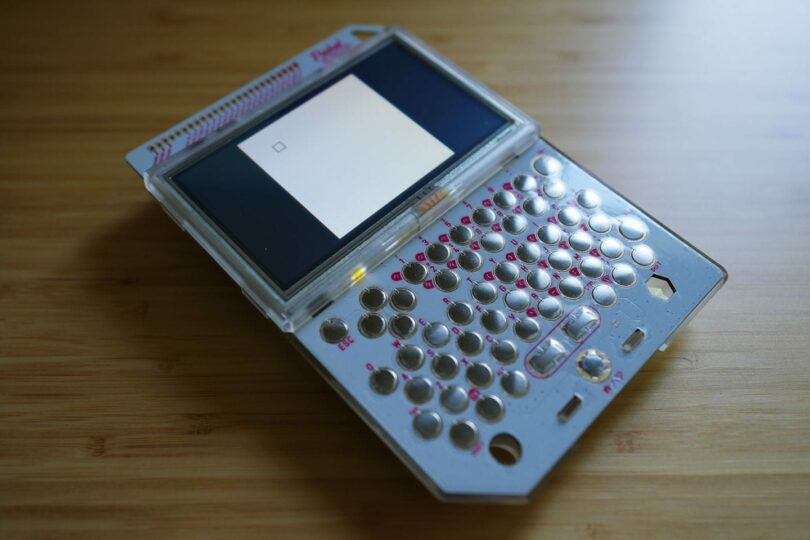
Once we have these starting coordinates, we can start our _draw function. PICO-8 will call _draw once every cycle, and as its name implies, it should handle all your drawing or display code. We will first call the cls function to clear the screen and fill it with the specified color. In this case, we’re using 7, which is the closest color to white in the PICO-8 palette. Then we draw our box on the screen with the rect function. We need to provide as arguments our x1, y1, x2, and y2 coordinates and then a color. Here we’re passing it the color 0, which is nearest to black. If you were to run your game after this, you would see a small black box drawn on a white background. Nice.
function _draw()
 cls(7)
 rect(x,y,x+w,y+h,0)
end
Handling User Input
Next, we need to handle user input. In PICO-8, this and any other game state changes should be done in the _update function. Alternatively, you could use _update60 if you want your game to run at 60fps. We will want to check if the user is pressing the left or the right direction to move along the x-axis. And also if the user is pressing the up or down direction to move along the y-axis. PICO-8 has a btn function to check for inputs. If the user pushes button 0, which corresponds to the left arrow, we want to decrease x. Otherwise, we want to increase it if pressing button 1, the right arrow. We do the same for buttons 2 (up) and 3 (down) but substitute the y-axis. Rerunning the game will now allow you to control the box and move it around the screen.
function _update()
 if btn(0) then
  x-=1
 elseif btn(1) then
  x+=1
 end

 if btn(2) then
  y-=1
 elseif btn(3) then
  y+=1
 end
end
Wrapping Up
So with that, we have the basis of a game, albeit not a very fun game. But keep expanding and building on top of these initial building blocks. A couple of things you can work on to further this idea are preventing the box from moving off the screen. You could also use the other user inputs to shrink and enlarge the box. I’ve found this cheat sheet and the PICO-8 Manual to be invaluable resources.
If you wind up making any cool games, let me know. I’d love to try them out. And if I make anything interesting, I’ll be sure to share it here too.